

Yes, I've been making cute beaded necklaces with a marble effect.
And if you fancy making your own, here are the things you'll need:
Polymer Clay (I got mine from Ebay!),
A Pin or Toothpick,
Some String, or whatever material you'd like your 'chain' to be,
Glitter (optional, but totally cute!).
And I'm gonna walk you through how I created this.

1. Assemble all your tools, in a clean protected work space.

2. Decide on what colour clay you want to use. If using two together to make a marble effect like I did, try to use two that compliment each other well.


3. Start to squish, roll and soften your clay. It's gona be quite tough at first so you really wana loosen it up. You could even use a glass or rolling pin to flatten and roll it out. You can also add glitter to it now if you wish.

4. Mix in your second colour, if you wish to use one, and then roll this all together into a ball. You can decide on the size . I did one big one, two medium, and two a little smaller. I also used a range of colours too. Once you have your balls, pop your pin or toothpick right through the middle. You want this to be the width of your string, so it can pass through easily.

5. Now pop all your little creations on a baking tray & cook in the oven for 20 minutes at Gas Mark 4. I'm not sure what the equivalent of this is outside UK etc, but it's easily googled! Once done, let them cool for another 10-15. They should be hard now, and not able to squish.


6. Now you're ready to loop the string through, adjust it to the length you like & cut where needed. Then just tie the two string ends in a knot to secure. And...

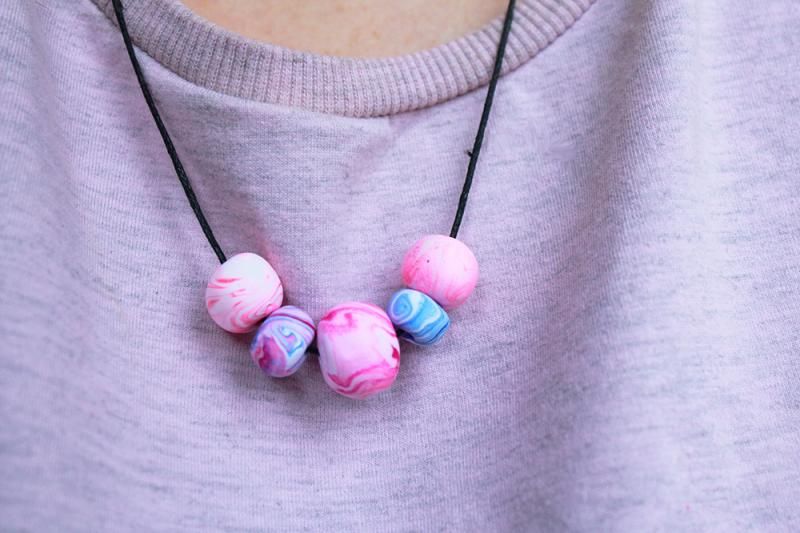
Voila! A pretty little creation to call your own.
This idea can be adjusted to make a bracelet, or maybe a key ring trinket etc. As you can see from the above photos, you don't just have to stick to spherical shapes either!
There's a lot of possibilities. I'm sure I'll be making a few more of these ^_^
What do you guys think?


So pretty, I love the marbled effect! Can't believe you made it yourself! x
ReplyDeleteBeauty with charm
Aww thanks Alina, it was so fun! ^_^ xx
DeleteYou are so talented! xx
ReplyDeleteYou're so sweet! :D x
DeleteI haven't messed around with fimo for years! These look so pretty, just like something you would buy in a shop!
ReplyDeleteFrancine from The Graduate Goddess xx
Aww thanks, I really loved making them! x
DeleteWow those are so nice and lovely that you can make it to what you want colour and size wise.
ReplyDeleteA very talented lady :)
Pam @ pamsstuffandthings.blogspot.com
I love these! They are great little things to make with the kids, though I haven't been brave enough to let them free with glitter yet. These have come out amazing and look so pretty x
ReplyDeletewow I love these! the design is great :D
ReplyDeleteMelissa x
http://melissazia.co.uk
Aww thanks Melissa! xx
DeleteSo cute and pretty, I love the marble effect! I need to get my hands on some polymer clay! :)
ReplyDeleteJessica
the.pyreflies.org
You can have endless fun with clay, - not just for kids ^_^ haha. Thanks Jess! xx
DeleteJem! these look amazing!! :)
ReplyDeleteAww fanks dude! ^__^ They are SO fun! I keep wearing them too I think they're cute haha x
Delete